")
")
Description
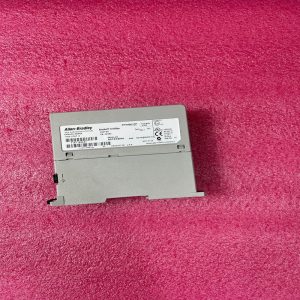
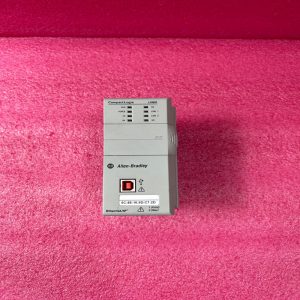
Brand:Allen-Bradley Model number:1783-ETAP
Colour:new Warranty: 12 months
Lead Time:3-day working day Country of origin: USA
Price: Please contact us Product weight:1.6kg
Product Dimensions:
1. Obtain the EDS file from rok.auto/pcdc.
2. From the Network pull-down menu, choose the EtherNet/IP™ network.
3. From the Device Type pull-down, choose Communication Adapter.
4. In the Bulletin/catalog number field, type 1783-ETAP.
5. Click Search.
6. Click Download to download the EDS file for the tap.
7. Save the file to an appropriate location on your computer.
8. Use your configuration software to register the downloaded file.
If you are using RSLinx Classic communication software, use the EDS Hardware Installation Tool.
Choose Start > All Programs > Rockwell Software > RSLinx > Tools.
Configure Internet Protocol Settings
Configure Internet Protocol (IP) settings, such as the IP address, in one of these ways:
• Use the tap’s default IP address of 169.254.1.1 by connecting the tap directly to a computer. To establish communication between a computer and the tap’s default IP
address, you have the following options:
– Enter a unique IP address in the local area connection properties for your computer. The computer’s IP address must be on the same subnet as the tap’s default
IP address, such as 169.254.1.2.
– Configure your computer to obtain its IP address automatically.
• Use IP settings that are configured in RSLinx Classic software or the Studio 5000 Logix Designer application.
• Acquire IP settings from a DHCP server.
• Acquire IP settings from a BOOTP server.
Use the DIP switches on the tap to select the configuration method to use for IP settings. Refer to Set the DIP Switches on page 9.
Use the DHCP/BOOTP Server
If your network infrastructure does not provide DHCP/BOOT functionality, you may download our DHCP/BOOTP server software to a personal computer running a Microsoft
Windows® operating system. You can use this computer as the DHCP/BOOTP server.
To set the network address by using the Rockwell Automation DHCP/BOOTP server, follow these steps.
1. Access the DHCP/BOOTP utility at https://ab.rockwellautomation.com.
2. Download the version 2.3.2 DHCP/BOOTP utility.
3. Extract the zipped files to a temporary directory.
4. In the temporary directory, double-click setup.exe to install the DHCP/BOOTP utility.
5. Run the utility.
6. See the following chart, which describes what happens next, depending on whether DHCP/BOOTP is enabled on the tap.

Shipping Port: Xiamen, China
Payment: Bank of Chicago, Bank of Singapore
Express cooperation: fedex, DHL, UPS and your express account
Service: Professional Sales provides 24 hours /7 days online service
Please make an inquiry for more models:
AB 1756-0B16E
AB 1756-0F4
AB 1756-0X8I
AB 1756-A10
AB 1756-A13
AB 1756-A17
AB 1756-A4
AB 1756-A7
AB 1756-BA11
AB 1756-BA2
AB 1756-CFM
AB 1756-CN2
AB 1756-CN2/B
AB 1756-CN21
AB 1756-CN2R
AB 1756-CN2R/B
AB 1756-CNB
AB 1756-CNB/A/B/C/D
AB 1756-CNB/D
AB 1756-CNB/E
AB 1756-CNBR
AB 1756-CNBR/A/D
AB 1756-CNBR/D
AB 1756-CNBR/E
AB 1756-CPR2
AB 1756-DHRIO
AB 1756-DHRIO/C
AB 1756-DHRIO/D
AB 1756-DHRIO/E
AB 1756-DMD30
AB 1756-DNB
AB 1756-DNB/A
AB 1756-DNB/A/B
AB 1756-DNB/B
AB 1756-DNB/C1756-DNB/D
AB 1756-DNB/D
AB 1756-DNB1
AB 1756-EN2T
AB 1756-EN2T/C
AB 1756-EN2T/D
AB 1756-EN2TR
AB 1756-EN2TR/B
AB 1756-EN3TR
AB 1756-ENBT
AB 1756-ENBT/A
AB 1756-ENET
AB 1756-EWEB
AB 1756-HSC
AB 1756-HSC1
AB 1756-HYD02
AB 1756-IA16/A
AB 1756-IA32
AB 1756-IB16
AB 1756-IB16/A
AB 1756-IB16D
AB 1756-IB16I
AB 1756-IB16ISOE
AB 1756-IB16SOE
AB 1756-IB32
AB 1756-IB32/A
AB 1756-IF16
AB 1756-IF16/A
AB 1756-IF161
AB 1756-IF16H
AB 1756-IF4FXOF2F
AB 1756-IF6CIS
AB 1756-IF6I
AB 1756-IF8
AB 1756-IF8H
AB 1756-IF8U
AB 1756-IG16
AB 1756-IH16I
AB 1756-IM16I
AB 1756-IM16I1203-CN1
AB 1756-IN16
AB 1756-IR6I
AB 1756-IRT8I
AB 1756-IT6I
AB 1756-IT6I2
AB 1756-IV16
AB 1756-IV32
AB 1756-L1M1
AB 1756-L35E
AB 1756-L55M12
AB 1756L55M13
AB 1756-L55M13
AB 1756-L55M14
AB 1756L55M16
AB 1756-L55M16
AB 1756L55M22
AB 1756-L55M22
AB 1756L55M23
AB 1756-L55M23